
You use air compressors for many things, from running the tools in your workshop to running HVAC systems to inflating tires. So, when your air compressor doesn’t turn on, it can put you in a real bind. Luckily, there are several ways to fix a stubborn air compressor!
So, how do you fix an air compressor that won’t turn on? Fixes for air compressors that won’t turn on fall into three main categories:
1.Power Supply failure
2.electrical–mechanical Failure
3.Mechanical failure
Inspect / Test / Repair or Replace
Power Supply Failures
Depending on the type of compressor you are having issues with will determine the order and how you want to test the power supply.
A. 12 Volt compressors
- Inspect and test fuse
- test voltage at battery
- inspect, clean and test connections At Battery
B. 110 volt A/C Compressor
- Inspect and test Breaker as needed
- test power at outlet
- inspect and test cord from outlet to pressure switch
C. 220 volt A/C Compressor
- Inspect and test breaker (Remember 220 has two legs of 110 power)
- inspect and test power at outlet (with a meter test each leg separately for 110 volts then test both legs together for 220 volts)
- inspect and test voltage through cord to Pressure switch
electrical-mechanical Failure
Electrical-Mechanical failure are mechanical switches that power passes through to turn on and off the electrical portion of the compressor during normal operation.
| Quick Tip: The most common of all electric compressors not starting is a worn blade contacts. on some industrial compressors it is possible to replace them, but on smaller compressors we normally replace them. |
- pressure switch is not functioning properly
- manually operated switch on the pressure switch is off or not functioning.
- thermal switch on motor is tripped
- motor capacitor is bad (This may cause the thermal switch to trip)
- motor bad
Mechanical failure
Mechanical failure is non electrical but can cause a variety of concerns from tripped Breakers to burnt up motors.
- debris is caught in the belt
- pump is locked up or will not turn freely (usually caused by lack of oil or the wrong oil being used)
- head pressure release valve stuck closed
- Check valve stuck closed (I have only seen this one time the check valve was incorporated into the manifold. the pressure switch was located in the same manifold the valve was stuck not letting pressure into the tank and bypassing and pressurizing the pressure switch shutting off the motor)
| Below You will find common issues with air compressors and repairs |
1. common electric air compressor startup issues
- Check that the air compressor is switched ‘ON’
- Replacing the electrical cord
- Checking the electrical outlet
2.Fixes for common gas air compressor startup issues
- low oil pressure switch is bad
- low oil
- start switch is off or bad
- poor fuel quality
- stuck choke
- bad spark plug
Fixing an air compressor that won’t turn on can seem like a daunting problem to try to tackle as a DIY. Read on to find out the common problems that cause an air compressor not to turn on and the steps you can take to fix your air compressor when it doesn’t start.
Why Won’t Your Air Compressor Turn On?
f your air compressor is refusing to turn on, the first thing you must do to fix it is to figure out what the issue is. This may sound easy, but there are two things to consider when trying to find the root of the startup problem:
- Since there are two different types of air compressors – electric-powered and gas-powered – there are also different problems that can arise and different ways of fixing them.
- Not all root issues of an air compressor startup problem can be fixed by you, and some may not be able to be fixed at all.
So, before you begin examining your air compressor (and especially before you begin taking it apart), consider the following details about electric- and gas-powered air compressors.
When you are diagnosing your electric-powered air compressor that won’t turn on, you need to consider several elements of how the air compressor functions:
- If you have an electric-powered air compressor, the first thing you need to check is the electricity going to your motor.
2. The secondary components include the parts of the air compressor that create and regulate the air pressure.
3. Finally, you may want to consider looking at the internal moving parts, such as the pulley or belt.
4. Most electric-powered air compressors have factory-sealed and lubricated parts, so you will probably not be able to change out the oil.
When you are diagnosing your gas-powered air compressor that won’t turn on, you need to consider several elements of how the air compressor functions.
- Check the components that supply power from the motor to the air pressure components, such as the belt and pulley.
2. You need to check the secondary elements that are the parts of the air compressor, which create and regulate the air pressure.
3. A gas-powered air compressor takes special air compressor motor oil. If the oil tank has emulsification in it, that will need to be flushed and cleaned.
General Fixes for all Air Compressor Startup Issues.
Several of the general issues for air compressors that won’t start can be fixed by you, whether they are gas-powered or electric-powered. These fixes require you to replace worn out or defective parts in your air compressor.
Common parts that you may need to replace or rebuild for your fix are:
- The pressure switch
- The check valve
- The pump motor
- The regulator
Any of these parts can be tested for continuity with a multimeter, and if the reading is infinity for the part, it needs to be replaced.
Replacing the Air Compressor Pressure Switch
The pressure switch starts the motor for the pump as the air empties from the tank. It switches on the engine and pumps when the pressure gets too low on the tank to keep it filled with the appropriate amount of pressure. If you have an old air compressor, the odds are that you have a worn-out pressure switch, which is not doing its job.
To replace the air compressor pressure switch, you will need the following tools:
- A Phillips head screwdriver
- A utility wrench or multiple size wrench set for the various valves on the air compressor
- A new air compressor pressure switch for your model and brand of air compressor
The air compressor pressure switch can be accessed and replaced by following these steps:
- Unplug the electricity: If you have an electrically powered air compressor, you should accomplish all work on the machine while it is unplugged. Keeping the machine plugged in risks electrocution while working.
2. Remove all air pressure: The safety valve on the air tank of the air compressor has a ring. Pull the ring to release the air from the tank. The air released at pressure may be frigid as the pressurized air comes out, so it is best to wear protective gloves while pulling the ring on the safety valve.
3. Disassemble the tank pressure gauge: Using a wrench, unscrew and remove the tank pressure gauge. You can find the pressure gauge on top of the air compressor.
4. Unscrew and remove the pressure switch tube: The pressure switch tube is connected to the check valve and pressure switch. Remove the pressure switch tube and its fittings and place them to the side. The fitting is screwed on and will need to be loosened before removal.
5. Disassemble the pressure regulator: Loosen the pressure regulator and its assembly from one position on the air compressor. Using a wrench at the neck of the pressure regulator, loosen and remove the entire assembly and place it to the side.
6. Remove the old pressure switch: Using a screwdriver, remove the pressure switch cover. Now, you should have access to the pressure switch and the several wires leading away from it and several power cord strain reliefs. The position of the cables and their connections is essential, so you may want to take a picture of the pressure switch after the cover is removed. Disconnect both of the black and green wires from the pressure switch and pull the power cord strains from the pressure switch. The safety valve is also connected to the pressure switch, unscrew it and remove it to the side. Finally, unscrew the entire pressure switch assembly from the pipe that attaches it to the air tank.
7. Replace with the new pressure switch: The new pressure switch can now be replaced in the old one’s place. The tank pipe should be a thread with thread sealing tape. Then, screw the new pressure switch onto the tank via the tube with the sealing tape. The safety valve can then be added. Next, remove the pressure switch cover and reassemble the wires just as the picture you took shows, then close up and tighten the pressure switch cover.
8. Reinstall the pressure regulator, pressure switch tube, and pressure gauge: After applying pressure sealing tape to the threads of the pipes, tighten the pressure regulator and pressure switch tube back onto the air compressor and the pressure gauge on to the top of the air compressor.
9. Plug the air compressor in: After all components have been tightened securely back in place, plug the air compressor back into the wall outlet and test the pressure in the tank by turning it on.
Replacing the Air Compressor Check Valve
One of the most common problems for an air compressor that won’t turn on is a worn out or faulty check valve. The check valve is a one-way valve that stops the pressurized air in the tank from flowing back into the air pump. If this check valve is faulty, it may be stuck open. Air pressure in the tank will not be able to build since it is continuously flowing back into the pump. This can also cause the air pump to work overtime and can cause it to burn out.
You will need the following tools to replace the air compressor check valve:
- A Phillips head screwdriver
- A utility wrench or multiple size wrench set for the various valves on the air compressor
- A new check valve that is manufacturer recognized.
By following these easy steps, you should be able to remove the old check valve and replace it with a new one:
- Unplug the electricity: If you have an electrically powered air compressor, all work on it should be done with the machine unplugged so that you don’t risk electrocution while working on the machine.
2. Remove all air pressure: The safety valve on the air tank of the air compressor has a ring. Pull the ring to release the air from the tank. This may be very cold as the pressurized air comes out, so it is best to wear protective gloves while pulling the ring on the safety valve.
3. Unscrew and remove the outlet pressure tube: The outlet pressure tube runs from the check valve out of the tank. Unscrew it and disconnect it to get access to the check valve.
4. Remove the pressure switch: The pressure switch is connected to the check valve. Carefully use a wrench to loosen and remove it, so the check valve is standing alone.
5. Remove the old check valve: The check valve can be removed with a wrench. Be careful not to strip the thread or damage the tank as you remove the old check valve.
6. Replace with the new check valve: Using the threading, tighten the new check valve in place so that it is aligned with the fitting and can connect to the pressure switch tube.
7. Replace the outlet: The outlet tube that you removed can now be replaced into its original position on the new check valve.
8. Plug the air compressor in After: all components have been tightened securely again in place, plug the air compressor back into the wall outlet and test the pressure in the tank by turning it on.
Rebuilding the Air Compressor Pump Motor
The air compressor will not turn on if the pump motor has gone out or is damaged. This can happen from overheating, moisture build-up when being stored, or a faulty motor component. You may have smelled burning if the pump motor burnt up because of overheating. There could also be a lack of pressure because of a bad valve seal in the engine.
Whatever the cause, you will need to following tools to replace the air compressor pump motor:
- A wrench set
- A torque wrench
- A slotted screwdriver
- A new piston compression ring
- A new piston sleeve
- A new pump motor valve plate
Since this is a rebuild and not a simple replacement, it will take a little bit more time than other fixes on this list. Follow these steps to rebuild your air compressor pump motor:
- Unplug the electricity: If you have an electrically powered air compressor, all work on it should be done with the machine unplugged so that you don’t risk electrocution while working on the machine.
2. Remove all air pressure: The safety valve on the air tank of the air compressor has a ring. Pull the ring to release the air from the tank. This may be very cold as the pressurized air comes out, so it is best to wear protective gloves while pulling the ring on the safety valve.
3. Remove the air compressor body: The body of the air compressor is usually made of plastic and secured with locking tabs and mounting screws. Use the slotted screwdriver to loosen and remove the mounting screws. Then, locate and pop open the side tabs. Now, the entire body of the air compressor can be removed so that you have access to the internal components such as the pump motor. Using your fingers or a screwdriver, wedge the two sides of the air compressor body apart.
4. Take off the air outlet tubing: The air outlet tubing is a metal tube that is screwed into the body of the pump. Using a wrench, loosen and remove this tubing and set it to the side.
5. Take apart the pump head: The pump head looks like a metal part with many angled edges. It is attached to the pump with mounting screws that need to be loosened. Once loosened and removed, lift the pump head up and off and then remove the valve plate from underneath the pump head.
6. Loosen and remove fan: The fan is below where the valve plate was located in the body of the pump. Using the torque wrench, loosen the nut in the middle of the fan and remove the nut. Then, slide the fan away from the bolt and out of the body of the pump.
7. Take out the piston and the sleeve: The piston in the pump has a connecting rod connected to the bearing. Remove the connecting rod from the bearing and loosen the clamps that hold the piston. The piston and sleeve can now be pushed gently out of the body of the pump. Finally, remove the piston from the sleeve it is in once both are out of the body of the pump.
9. Remove the piston compression ring: The top of the piston has a Torx screw that needs to be loosened and removed to get access to the compression ring on the piston. The compression ring is under the piston cap. This ring is the part that will need to be replaced with a new piston ring to complete the secure seal in the pump motor.
10. Install the new compression ring and replace piston: Place the new compression ring snuggly in the place of the old one. Replace the piston cap and torque screw.
11. Install the new piston sleeve: The new piston sleeve should fit the piston snuggly. Place the piston inside of the new sleeve and replace it into the body of the pump motor.
12. Reinstall the piston into the pump motor: Attach the piston rod on the bearing by gently pushing. The rod should be flush against the bearing and then tightened with the Torx screw to about 48-inch pounds.
13. Reinstall the fan: Slide the fan back onto the bolt in the pump motor and tighten it on with the mounting bolts to about 120-inch pounds.
14. Assemble the new valve plate: The reed valves should be positioned on the handle side of the air compressor. The new plate should also come with an upper and lower valve plate seal. Position this on top of the new valve plate. The lower valve plate seal can then be positioned and installed on the plate.
15. Install the new valve plate with a seal: at the top of the pump motor place the new valve plate in position. Tighten the valve back down under the pump head with the mounting screws to 7-foot pounds. Reinstall the outlet tube to the pump head position.
16. Reassemble the air compressor body: Attached and pop the tabs of the air compressor body back into place around the motor and internal components. Tighten the mounting screws on the outside of the body.
14. Plug the air compressor in: After all components have been tightened securely back in place, plug the air compressor back into the wall outlet and test the pressure in the tank by turning it on.
Replacing the Air Compressor Regulator
The air compressor regulator regulates the air that is coming from the tank to the outflow. The air pressure that runs tools and inflates tires needs to be regulated; otherwise, it will flow at all times. The regulator is usually a type of valve that screws on tight to stop the flow of air pressure and can be loosened to allow air pressure to be released.
You will need the following tools to replace the air compressor check valve:
- A Phillips head screwdriver, if the regulator has a screw in the head
- A utility wrench or multiple size wrench set for the various valves on the air compressor
- A new regulator dial and valve
Replacing the air compressor regulator is one of the easiest fixes for an air compressor that won’t turn on. Replacing the regulator can be done by following these easy steps:
- Unplug the electricity: If you have an electrically powered air compressor, all work on it should be done with the machine unplugged so that you don’t risk electrocution while working on the machine.
2. Remove all air pressure: The safety valve on the air tank of the air compressor has a ring. Pull the ring to release the air from the tank. This may be very cold as the pressurized air comes out, so it is best to wear protective gloves while pulling the ring on the safety valve.
3. Loosen and remove the outlet tubing on both sides of the regulator: The outlet tubing that comes from the pressurized air tank is connected to the regulator by threading. The other side of the outlet tubing runs from the regulator to the pressurized tools. Both outlet tubes need to be loosened and removed to gain access to the regulator. Using a wrench, carefully unthread the outlet tubing from both the tank and regulator and place it to the side.
4. Loosen and remove the regulator assembly: The regulator is made up of a valve and a dial that loosens or tightens the valve. This whole assembly can be removed from the air compressor mounting tube with a wrench. Gently loosen and remove the regulator assembly.
5. Attach the new regulator assembly: Apply thread seal tape to the thread of the tube and then attach the regulator assembly to the tube. Tighten until snug.
6. Reattach the outlet tubes to the regulator: Use the wrench to attach and tighten the outlet tubes to each side of the regulator. Make sure to line up the valve within to the right side of the outlet tubing.
7. Plug the air compressor in: After all components have been tightened securely back in place, plug the air compressor back into the wall outlet and test the pressure in the tank by turning it on.
Fixes for Common Electric Air Compressor Startup Issues
Along with the general air compressor fixes for startup issues, electric air compressors may need additional fixes to get them to start up again. The main issue with electrical air compressors, other than the internal components, is the electrical supply, which can be fixed by replacing the electrical cord to the air compressor.
The most common fixes for electrical air compressors that won’t turn on are:
- Checking that the air compressor is switched ‘ON’
- Replacing the electrical cord
- Checking electrical outlet
Checking that the Air compressor is Switched ‘ON’
If you are new to operating your air compressor, you may not know where the ‘ON’ switch is located. If you plug in the air compressor and it does not turn on, search the side and top of the device for a switch or button. On most air compressors, this is located on the side near the air intake and is usually a switch made of metal. Flip it while the air compressor is plugged into an electrical outlet to see if this is your problem
Checking the Power Outlet
There could be a problem with the electricity flowing to the air compressor. By checking the wall outlet, you may detect that the power from the power outlet is not working.
The following steps will help you to check the power coming from the wall power outlet:
- Unplug the air compressor
- Make sure that the power in the fuse box is still on for the outlet
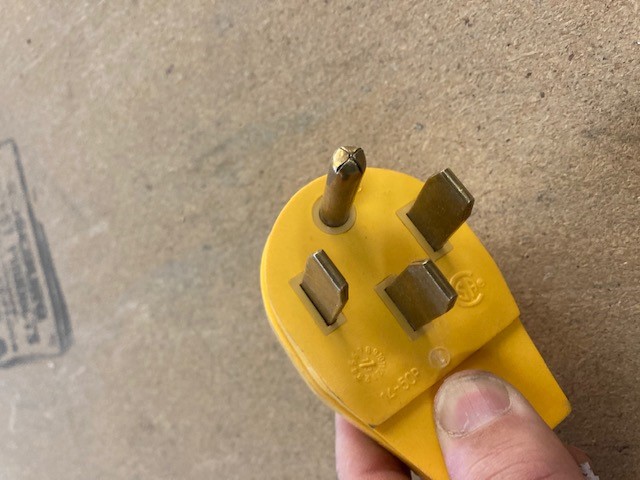
- Using a multimeter, check the voltage output for each combination of the three-prong outlets.
- The two electrodes of the multimeter need to be inserted into separate holes of the outlet. Two combinations of this should read 120 volts, and one combination should read 240 volts. If any combination is different than these readings, you may need to have an electrician replace the wall outlet.
Replacing the Electrical Cord
If the electrical cord to your air compressor is damaged, that could be your problem. Also, if you have used a multimeter to test the continuity of the electrical prongs and found that one or all of them show up as an infinity reading, you will need to replace the power cord.
The process of replacing the electrical cable to an electrically powered air compressor requires the following tools:
- Wire stripping pliers
- A Phillips head screwdriver
- A new 3-prong power cord
- A multimeter device
To replace the electrical cable, you will need to follow these steps:
- Remove the metal casing that surrounds the electrical cord entrance to the air compressor.
2. Once loosened, the metal casing should slide away and reveal the metal screws that hold the contact points of the power cord to the motor. Verify that your screwdriver will work for these screws.
3. Carefully remove each of the screws and put them to the side to use for the new power cord.
4. Slip the old power cord out of the metal casing and discard.
5. Place the new power cord through the metal casing and put the electrical wire contact points against the contact points on the motor.
6. Use the screwdriver and tighten the screws into the contact points of the electrical wire until they are snug.
7. Using the multimeter, test the continuity of the power cord prongs. If all reads are low and not infinity, the cord is ready to be used.
8. Replace the metal casing to its original position and tighten it back into place with the screwdriver.
Fixes for Common Gas Air Compressor Startup Issues
Along with the problems of the internal components of the air compressor, gas air compressors also need oil and fuel to start up and run.
If the oil lubricating the engine of the air compressor has somehow become fouled or is low, you will need to:
- Flush the oil tank
- Clean the oil tank
- Change the oil
Flush and Clean the Oil Tank of the Air Compressor
If you have a gasoline-powered air compressor that requires you to change the oil on it, you may have used the wrong type of oil. Air compressors have specially made oils that include no detergents in their mixture.
An oil mixture with detergents may be standard for automobiles, but they can cause condensation and emulsification in the oil tank of an air compressor. This emulsification can cause blockage, clogs, and, eventually, engine failure.
To do a flush and clean of your air compressor, you will need the following items:
- Diesel fuel
- SW-30 non-detergent motor oil
- Wrench set
Cleaning out the sludge left behind by inferior motor oils that may have been used in your air compressor is not easy, but it can be done by following the steps below:
- Drain the old oil: Open the oil valve and drain out all the old oil overnight. If the sludge and emulsification are horrible, you may even see dripping and oozing after the 24 hours of draining are complete.
2. Fill the oil tank with diesel: The diesel in the oil tank should act as a detergent agent without leaving residue or condensation behind. Open all the valves on the air compressor so that no pressure builds up and starts the engine for two to three minutes.
3. Stop and drain immediately: Stop the engine and drain the oil immediately. When you drain immediately, you have a better chance of getting the larger chunks of sludge to drain out of the oil tank.
4. Fill the oil tank with regular SW-30 non-detergent oil: Fill the oil tank with regular non-detergent oil and start up the engine again. Let it run for a few minutes and then drain the oil. This will remove any trace of the diesel left behind.
5. Fill the oil tank with regular SW-30 non-detergent oil (again): Once you fill the oil tank the second time, you should be good to go. If you drained the SW-30 the first time and noticed some sludge in the oil still, repeat the diesel, then SW-30 run and drain steps again. If not, leave this second tank of oil in.
In Conclusion
An air compressor that won’t start can be a real pain. The air compressor may be running most of the tools in your workshop and be putting you in a standstill. If you have an air compressor that won’t start, consider checking these causes and doing these fixes on your own before paying for a whole new air compressor.
Sources: